A hearing aid trial allows hearing aids to be fitted and adjusted for the person’s comfort.
Prepare the person by explaining that using hearing aids is not the same as having normal hearing. It takes time to adjust to using hearing aids.
A hearing aid trial includes:
- Fitting hearing aids
- Adjusting hearing aids.
Equipment
To fit hearing aids, you will need:
- Hearing aids with batteries
- Earmoulds in different sizes
- Earmould tubes
- Scissors
- Pen.
Tip
It is helpful to have extra pieces of tubing when learning how to fit hearing aids.
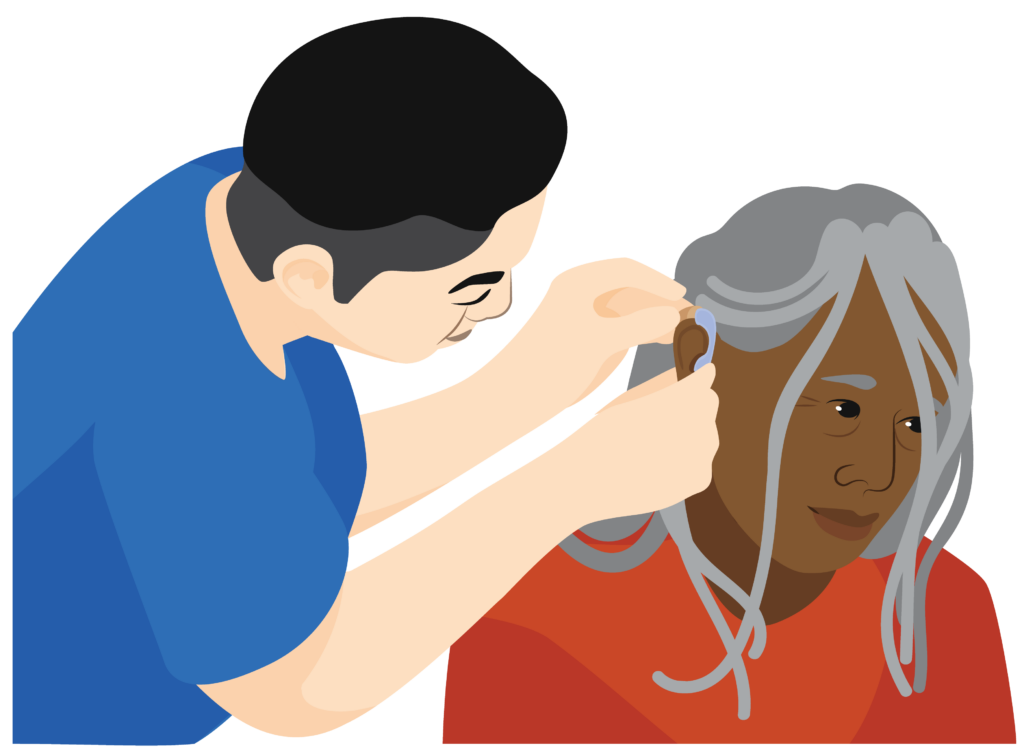
Fit hearing aids
This includes fitting the earmould and earmould tube.
Fit earmould
Earmoulds come in different sizes. Usually, in small, medium and large.
Select a suitable size of earmould for the person:
- The earmould fits correctly if it is comfortable and easy to insert and remove into/from the person’s ear canal
- The earmould should not feel loose inside the ear canal.
Tip
Adults usually need a medium or large earmould.
Activity
Gather earmoulds in different sizes.
In groups, practice selecting and fitting the correct size of earmould:
- Check the earmould is comfortable. If it is not comfortable Try a smaller size.
- Ask the person to open and close their mouth. The earmould should not pop out of the ear canal. If it comes out Try a smaller size.
- Look at the fit of the earmould in the ear canal. If it does not fill the ear canal Select a larger size.
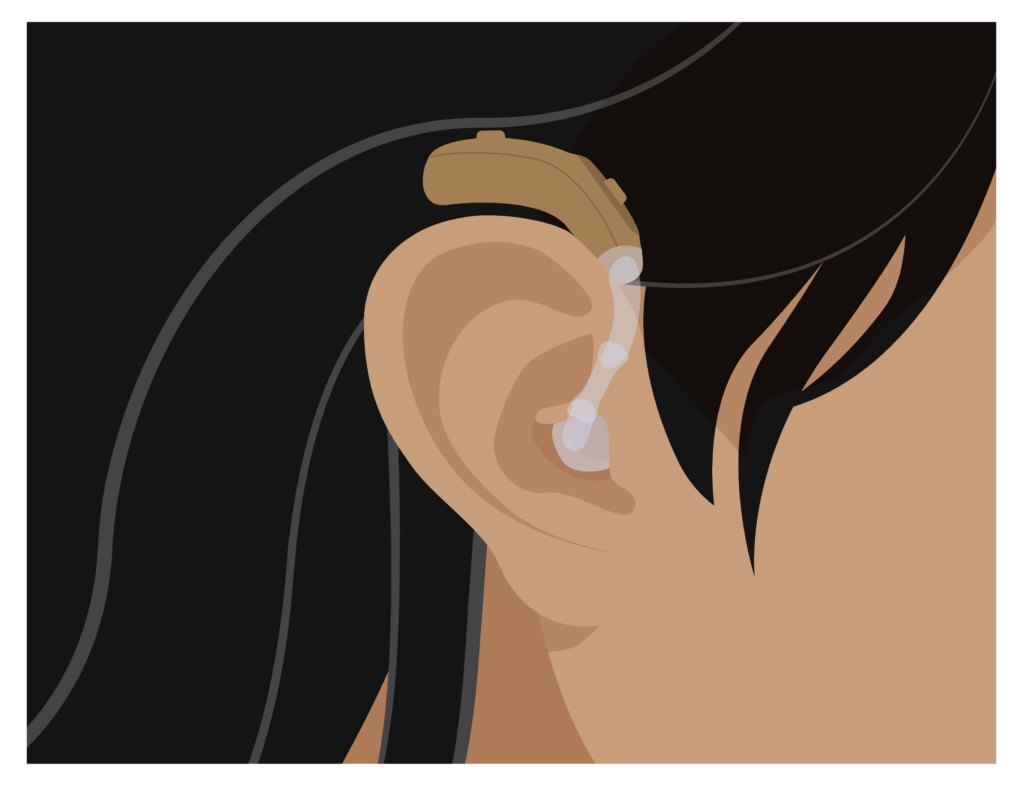
Fit earmould tube
To fit the hearing aid, it is important to cut the earmould tube to the correct length. Remove the battery before cutting the earmould tube to avoid feedback (whistling).
To insert the earmould:
- Hold the person’s pinna with one hand
- Pull the back of the ear upwards and backwards to straighten the person’s ear canal
- Hold the earmould between your finger and thumb level with the tragus (the tube should face upwards)
- Gently press the earmould into the person’s ear canal.
Instruction
Watch the video of cutting the earmould tube to fit.
Pause the video at each of these points:
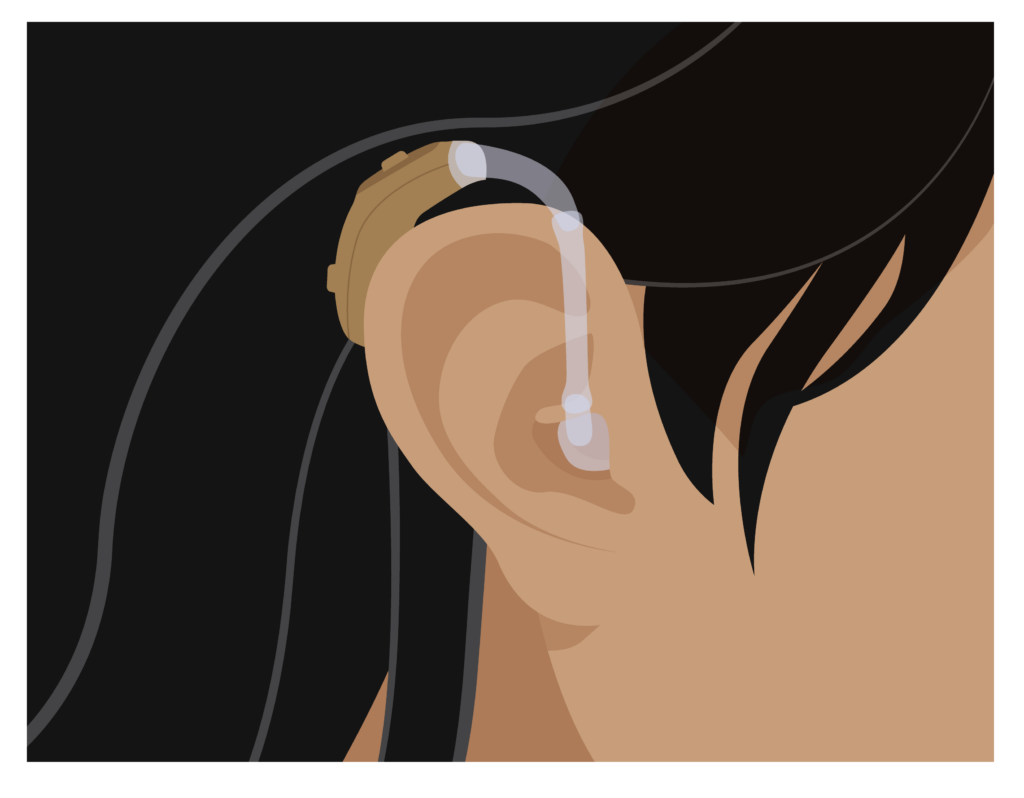
- Gently overlap the earmould tube over the ear hook of the hearing aid
- Mark with a pen where the tip of the tube meets with the ear hook and add 2-3 millimetres
- Remove the hearing aid and earmould from the person’s ear before cutting.
Question
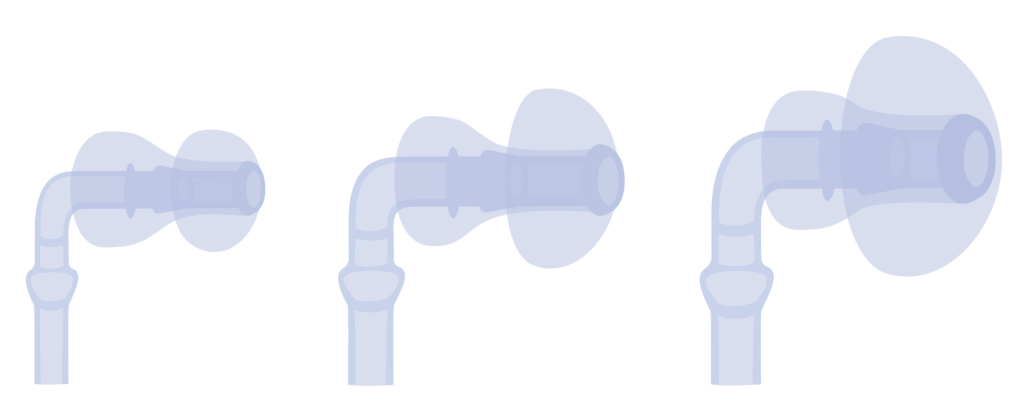
Look at the following pictures of a hearing aid on a person’s ear. Which is fitted correctly?
Incorrect.
The tube is too short. The hearing aid is not able to rest on the person’s ear.
Incorrect.
The tube is too long. It is raising the hearing aid above the person’s ear.
Correct!
The tube is the correct length. This allows the hearing aid to rest comfortably on top of the person’s ear.
Always hold the earmould and not the tube when removing.
Warning
Remove the hearing aid before cutting the earmould tube to avoid cutting the person’s skin.
Cut the marked tube and gently press the tube onto the ear hook.
Warning
Avoid twisting the tube when attaching it to the ear hook. Twisting the tubing can damage it and change or block the sound.
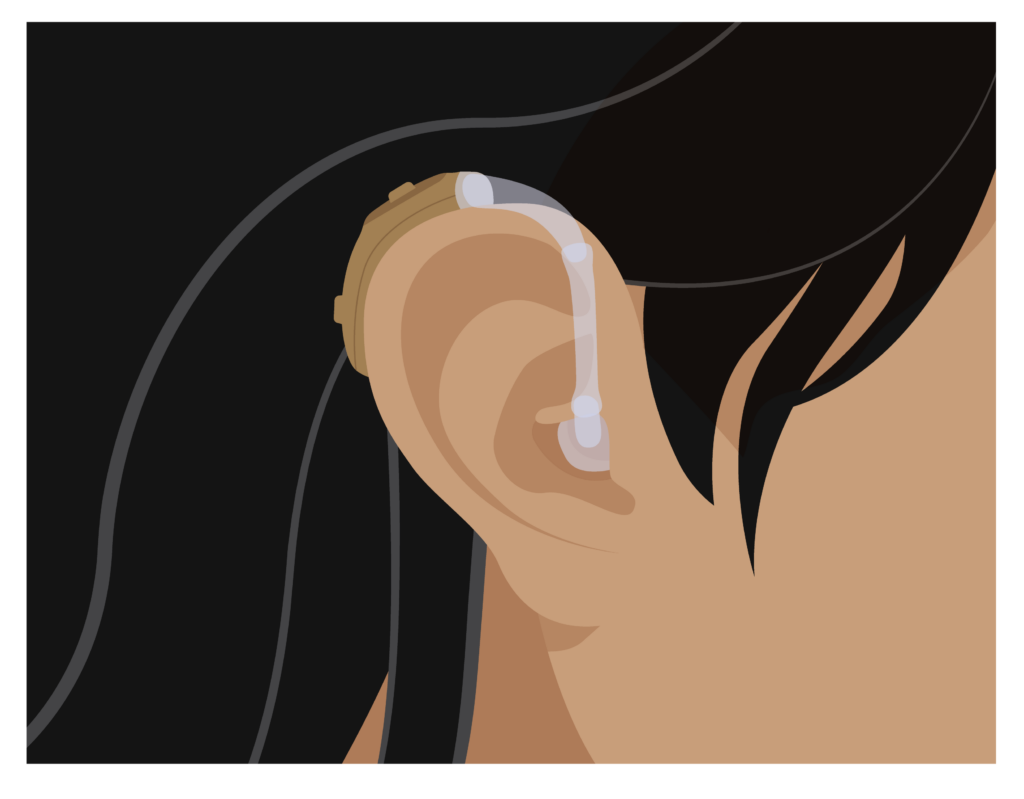
Fit of hearing aid
Check hearing aid fit without batteries.
A hearing aid fits correctly for a person when:
- The earmould is comfortable in their ear canal
- The hearing aid rests on their ear with no gaps.
If the tube does not fit properly, the sound may leak and cause feedback (whistling).
Adjust hearing aids
Make adjustments to the hearing aids if needed.
Prepare:
- Insert the battery, leaving the door half open
- Insert the earmould into the person’s ear and put a hearing aid on each ear.
Check the person can hear your voice clearly
- Turn on the hearing aids and adjust the volume until the person can hear your voice clearly
- Position yourself 1.5 metres away from the person and use your normal level of voice and talk clearly
- Ask the person if they found the sound of your voice too loud or soft
- If necessary, adjust the volume until comfort is reached
- Ask the person if your voice is clear
- If your voice is not clear, adjustments to the hearing aids may be needed.
Check for feedback
Put your open hand 5-10 centimetres away from the hearing aid on the person’s ear. There should be no feedback (whistling) sound.

Instruction
Check the problem solving table for solutions if there is feedback.
Discuss adjustments to the hearing aid programme with your mentor if these actions do not solve the problem.
Check how much the person is benefitting
Ask the person questions to understand if they are comfortable with how their hearing aid sounds.
Ask questions such as:
- How does that sound?
- Are you comfortable with the sound level?
Ask about the sound level for each hearing aid.
If the person is not satisfied with their preprogrammed hearing aids trial, discuss with your mentor. Refer to an ear and hearing professional if needed.
Activity
In groups, gather:
- Hearing aid with ear hook
- Suitable size earmould
- Practice pieces of tubing 5 centimetres long
- Scissors
- Pen.
1. Remove the tubing from the earmould and replace with the practice tubing
2. Cut the tube to the correct length
3. Check the hearing aid fit:
- Is the earmould comfortable and staying in place when the person opens and closes their mouth?
- Does the hearing aid rest comfortably on the top of their ear?
4. After fitting check:
- The person can hear your voice clearly and
- There is no feedback.