Instruction
In this topic you will learn about the steps to prepare for the vision and eye health screen.
Before the screening day
Refer to the Sensory screen checklist to go through the screening requirements:
- Ministry approvals
- Referral pathways
- Screening space and supporting logistics.
This includes organizing:
- Paperwork
- Screening equipment
- Additional personnel to help on the screening day.
Question
You are preparing for a screening day. What paperwork should be completed before the screening day?
Select to see answers.
Incorrect.
Notification forms are used after screening to inform parents/caregivers of the results for their child. Notification forms also provide information about referral (if needed).
Correct!
Consent forms must be obtained before carrying out sensory screening. Consent for each child must be given by an authorized person.
Incorrect.
Follow up referral lists are completed after the screening. They record children who require follow up by eye and/or ear care personnel. They also track whether the child has been seen.
Correct!
A School screening list is prepared by the school. It is a list of all children who have consent for screening.
Incorrect.
The Screen form is completed during the screening for each child.
Instruction
If you did not get the questions right, or were not sure, go back to the Introduction to sensory screening module.
Tip
Check equipment is in good working order before screening day.
On the screening day
- Set up the space
- Run the group preparation session for the children.
Setting up the space
You will need:
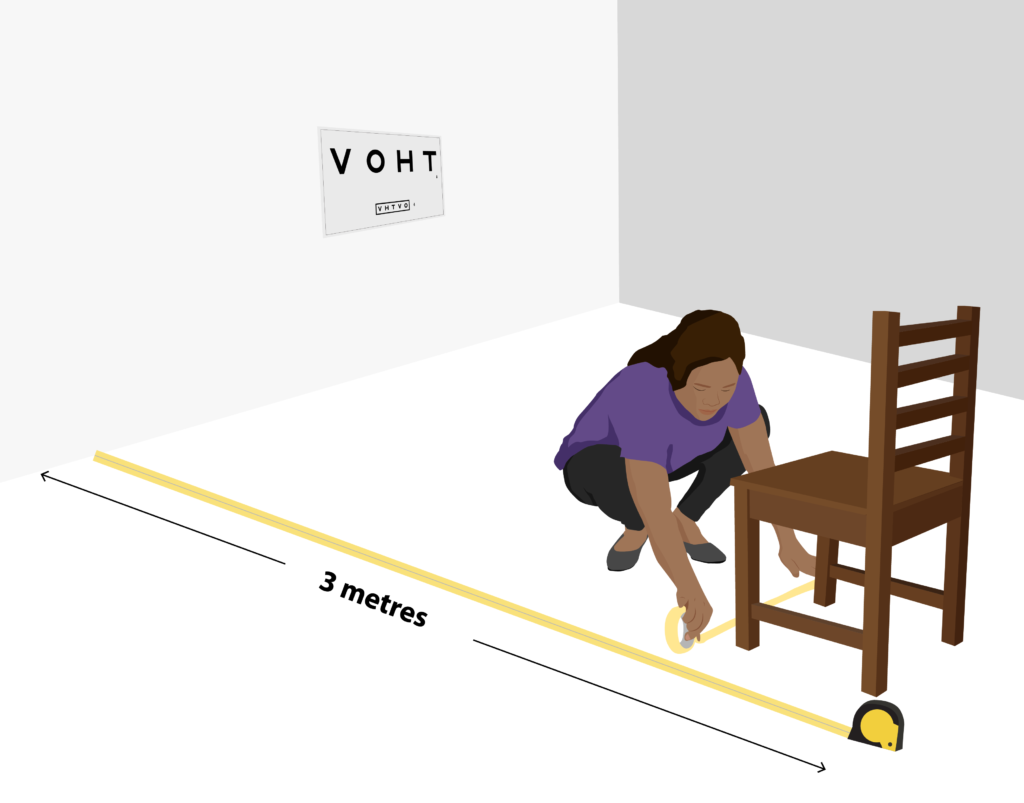
- Tape to stick the charts on the wall and to mark the floor
- Tape measure or three metre piece of string to measure the testing distance
- Table for the paperwork
- Chair for the child.
You should:
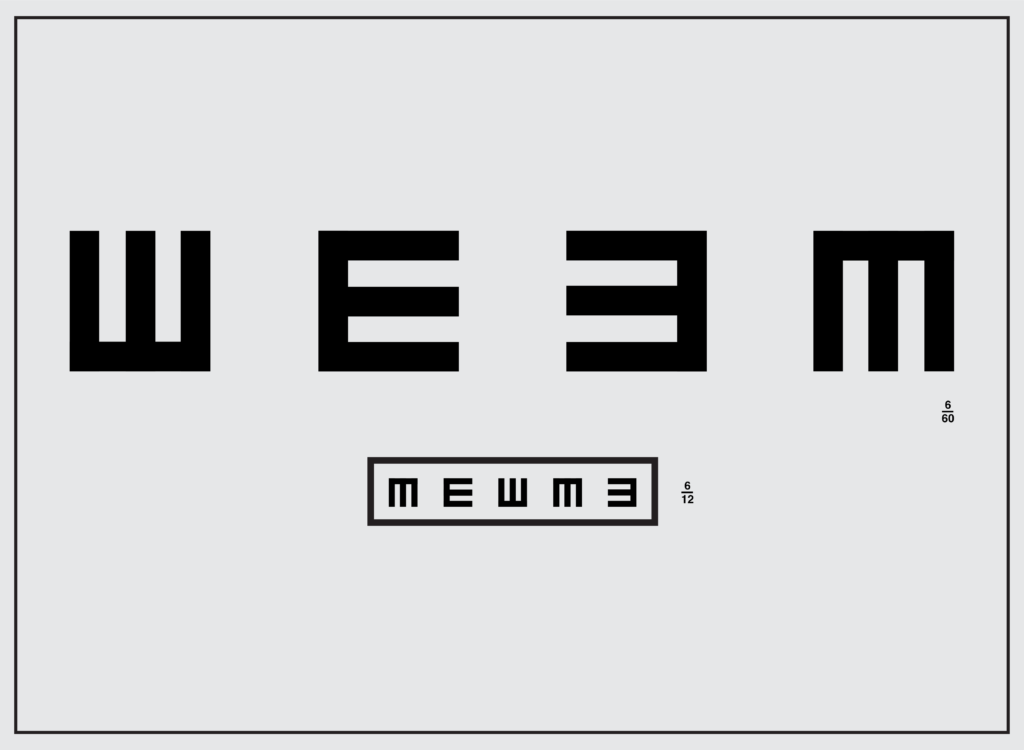
- Attach the HOTV or E chart at the correct height. The chart should be positioned at eye level for the children when they are sitting on the chair.
- Position chair at correct distance. Measure three metres from the vision chart to the back of the chair.
Tip
Place tape in front of the front legs of the chair to mark the position. This is in case the chair is moved accidentally.
Instruction
Watch the video of how to set up the screening space.
Activity
Practice setting up a space for a distance vision screen.
- Gather the equipment and check it is working
- Position chart at the correct height
- Position the chair at the correct distance.
Group preparation session
Gather all children with consent to be screened.
Explain you will check for signs of eye and ear problems to see if they need help for their eyes or ears. You will:
- Check how well they can see and look in their eyes
- Check how well they can hear and look in their ears.

Show the children the vision charts. Explain you will:
- Use a chart on the wall to find out how well they see in the distance
- Test one eye at a time by asking them to cover one eye while you test the other
- Ask them to look at letters on a chart during the test.
Show them the pen torch and explain that you will use it to look into their eyes.

Reassure them that nothing you do will hurt them.

Activity
In groups, one person explains the eye and eye health screen to the rest of the group.
Use examples of how to do this in a child-friendly way.
- Sit at the child’s level
- Smile and look at the children
- Let the children see the equipment
- Provide reassurance
- Explain things slowly and check the child has understood.
Instruction
Learn how to prepare the children for the hearing and ear health screen in the Hearing and ear health in children module.